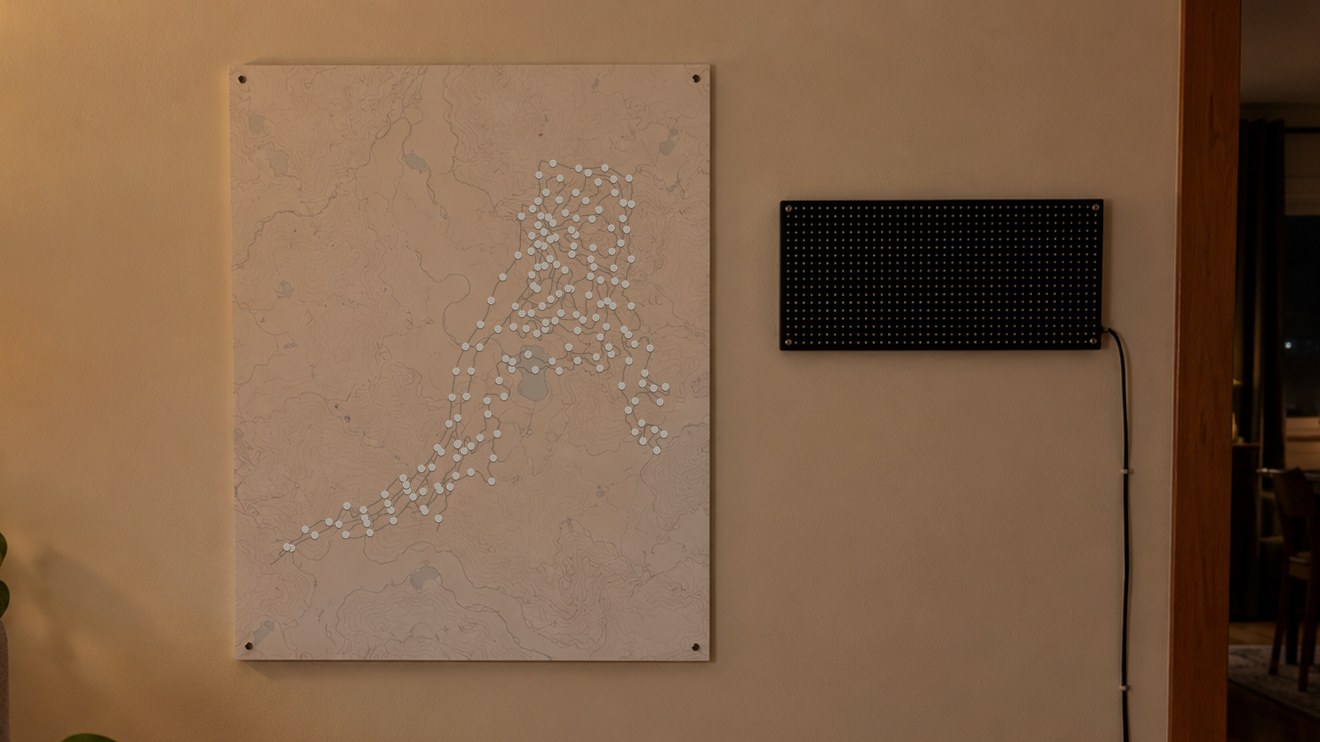
How it works
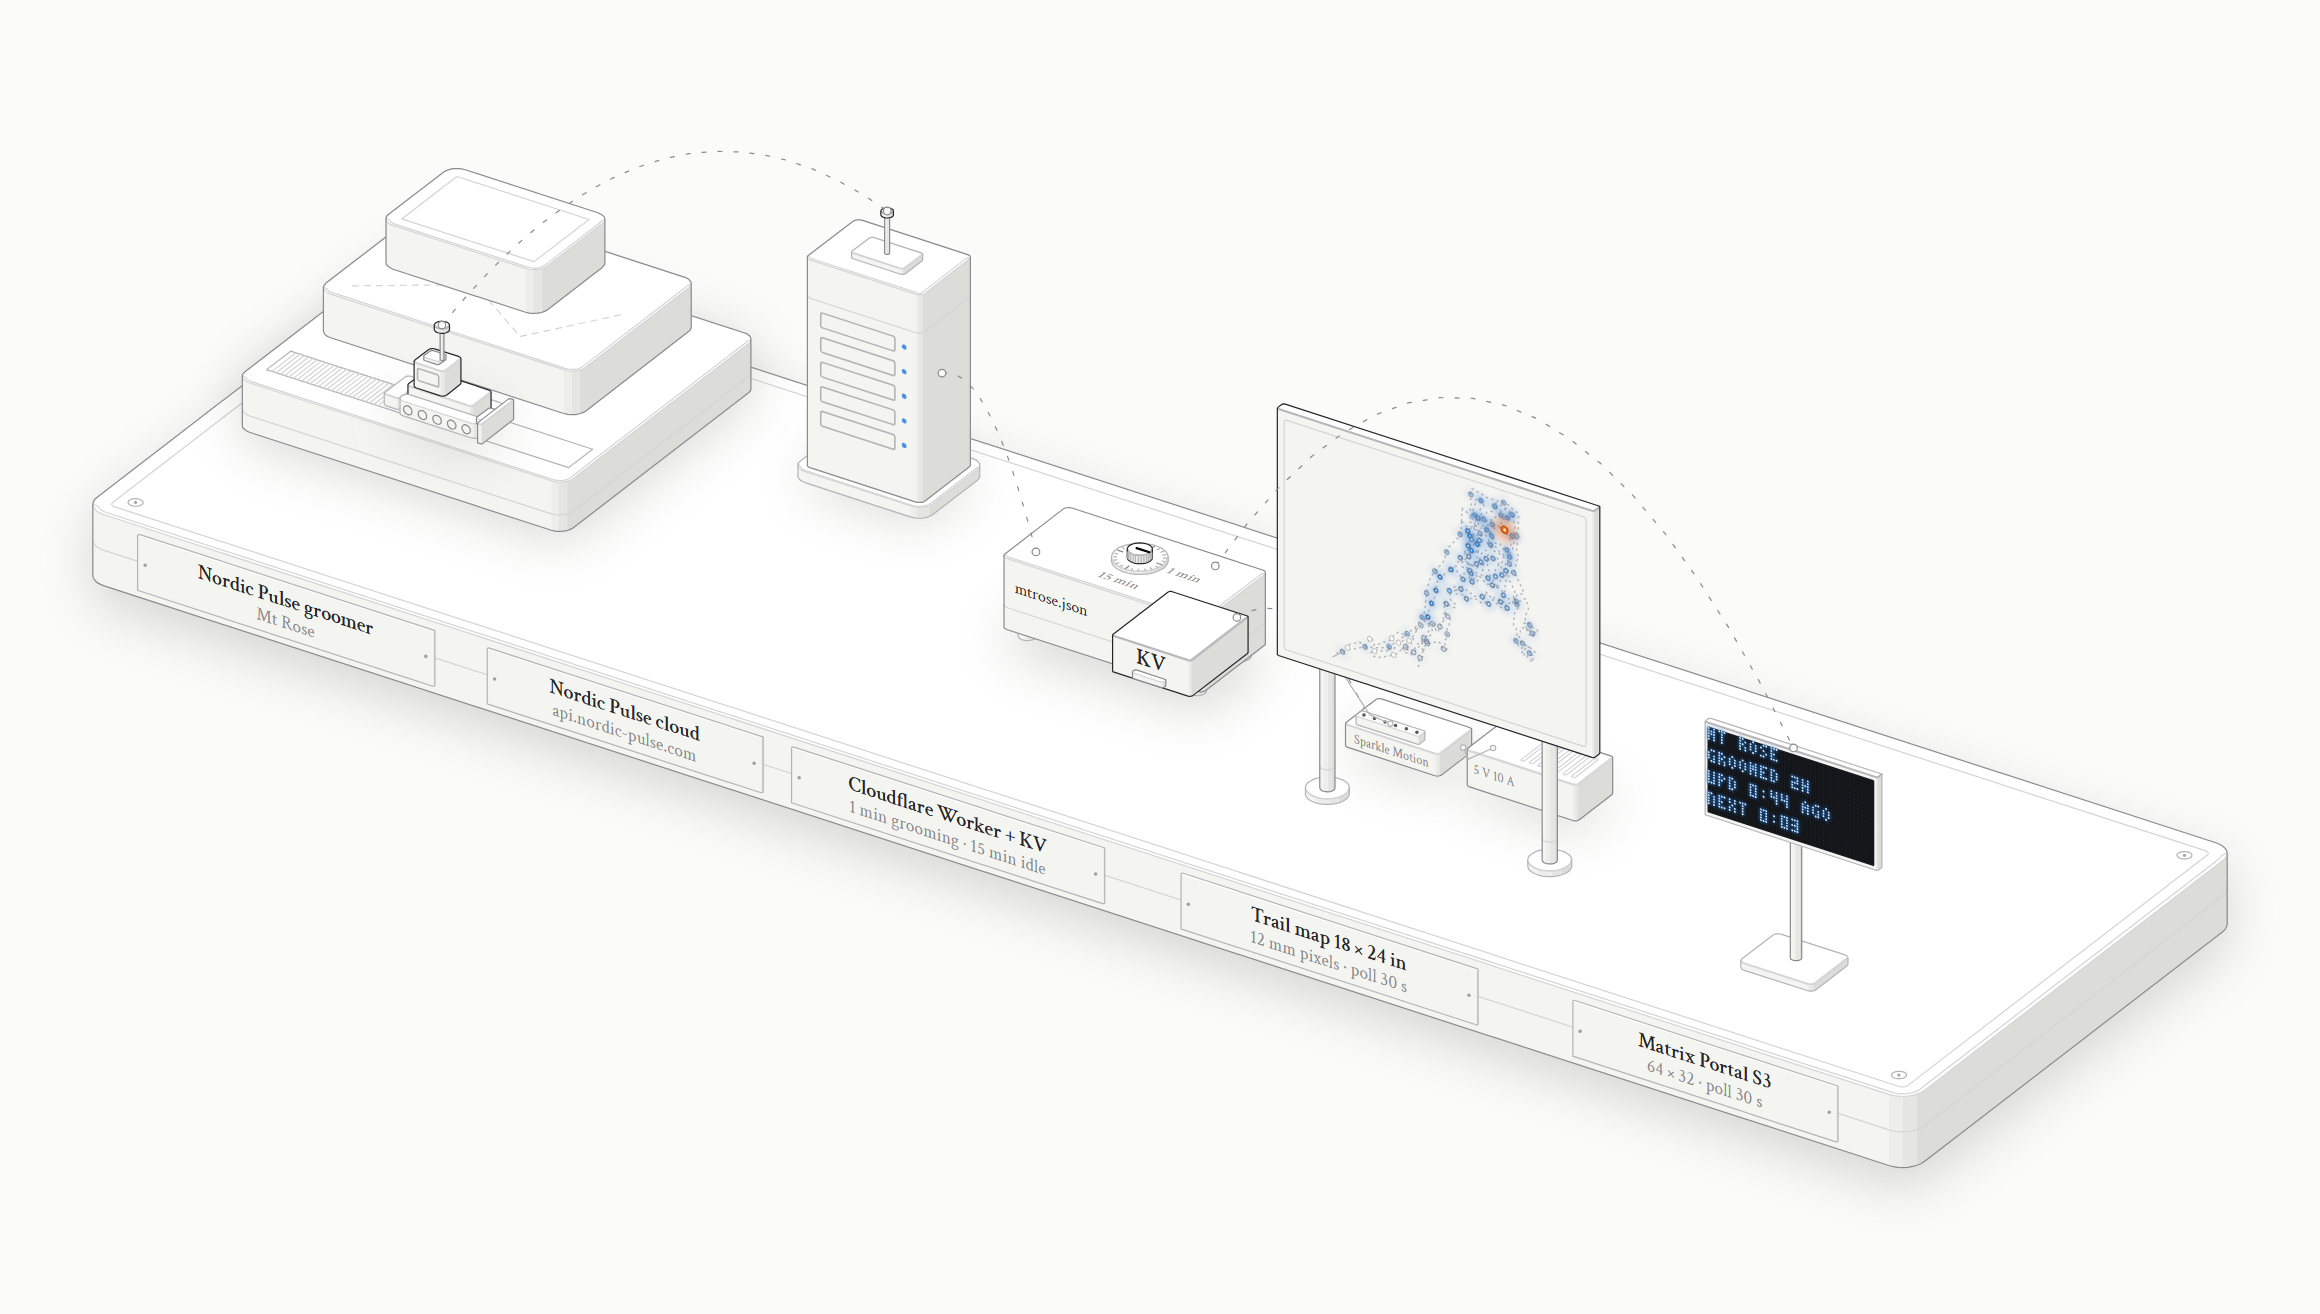
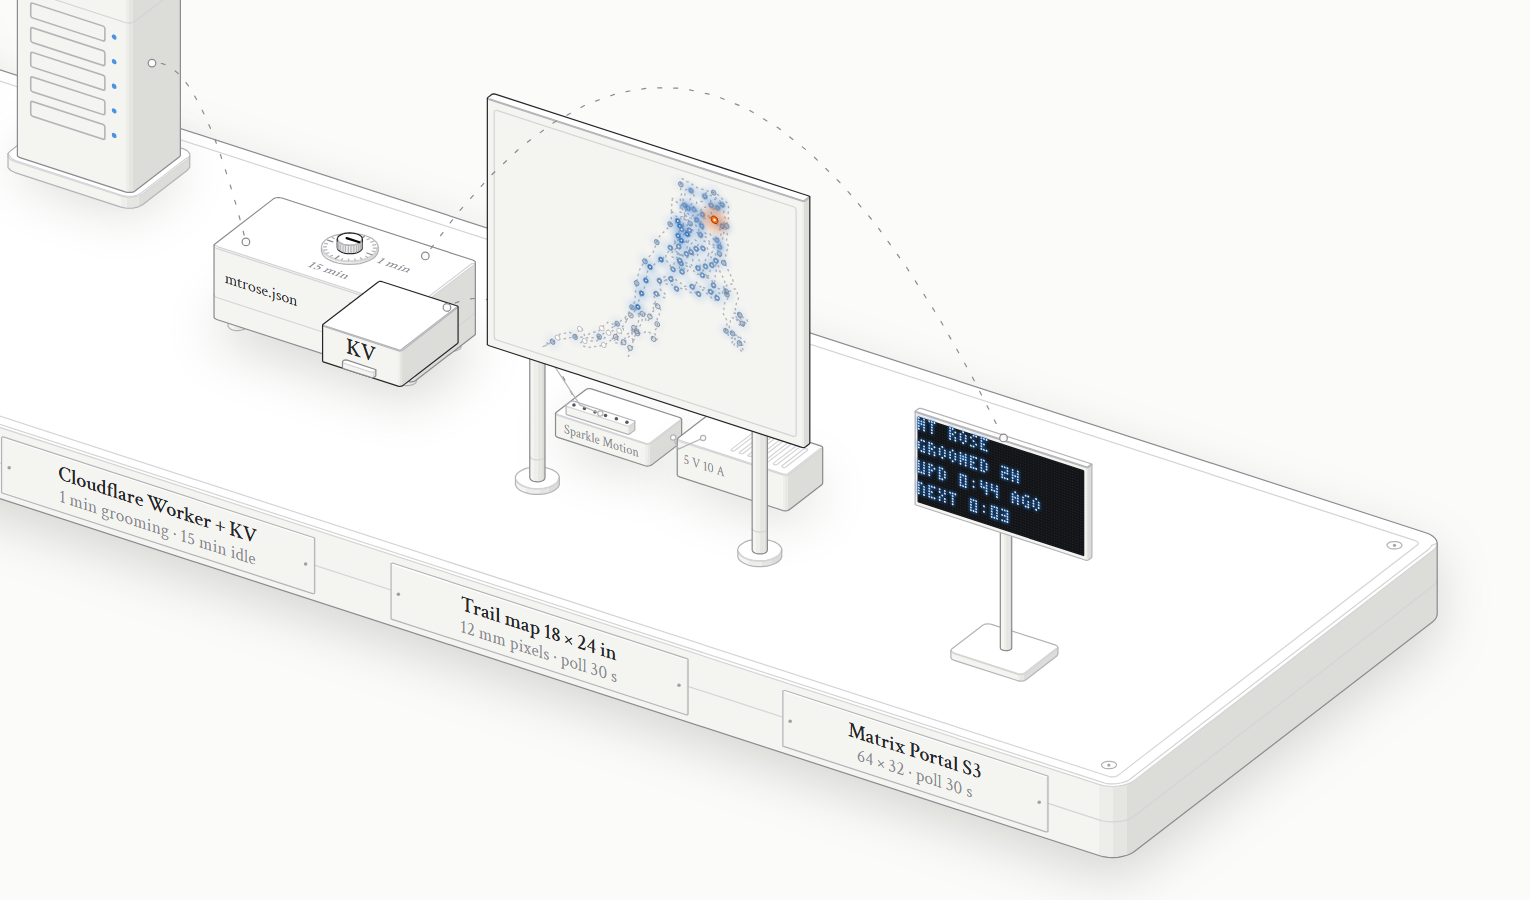
A Cloudflare Worker reads Mt Rose grooming from Nordic Pulse every 60 s while a groomer is active or a trail was groomed in the last 2 h, and every 15 min otherwise. It keeps the last good result and serves one file, mtrose.json.
The trail controller and the sign each read that file every 30 s. Each trail's pixels dim with time since grooming:
| Since grooming | Pixels |
|---|---|
| Under 12 h | Bright |
| 12 to 24 h | Medium |
| 24 to 36 h | Dim |
| 36 h to 4 d | Faint |
| Over 4 d | Off |
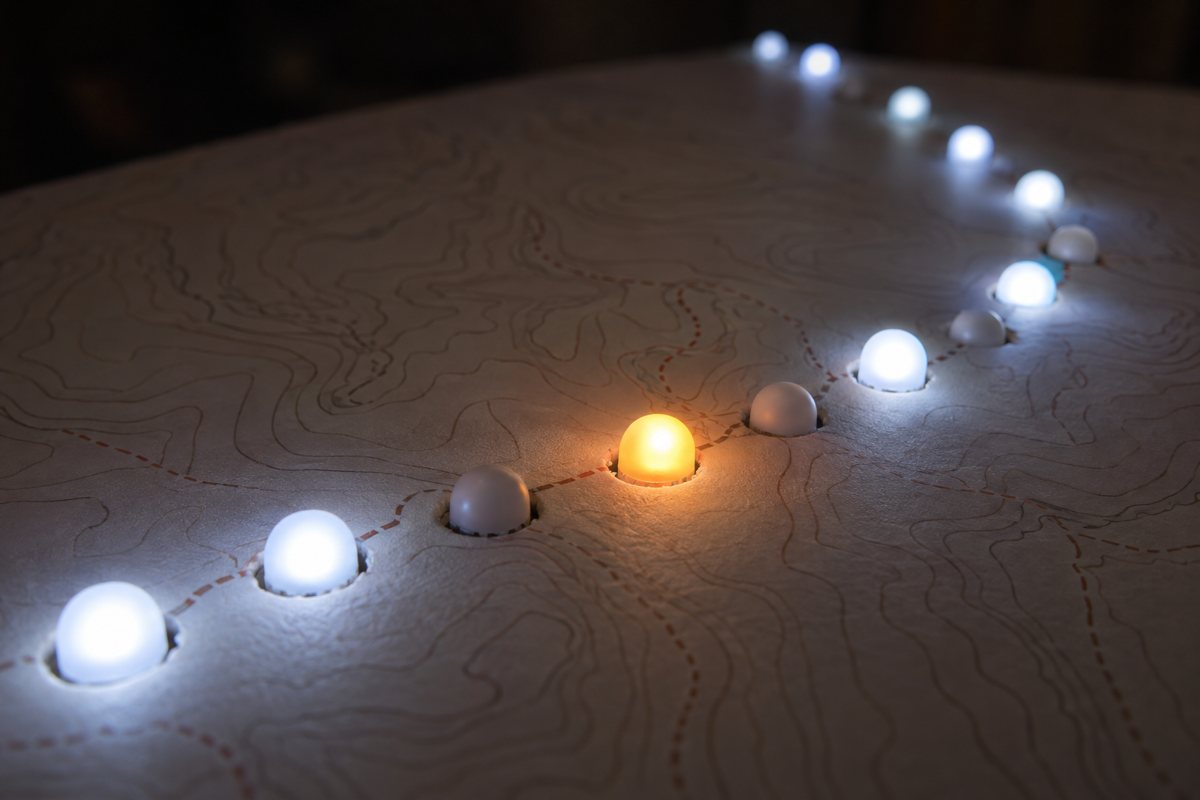
When the data carries a groomer position, one orange pixel marks it and that trail pulses.


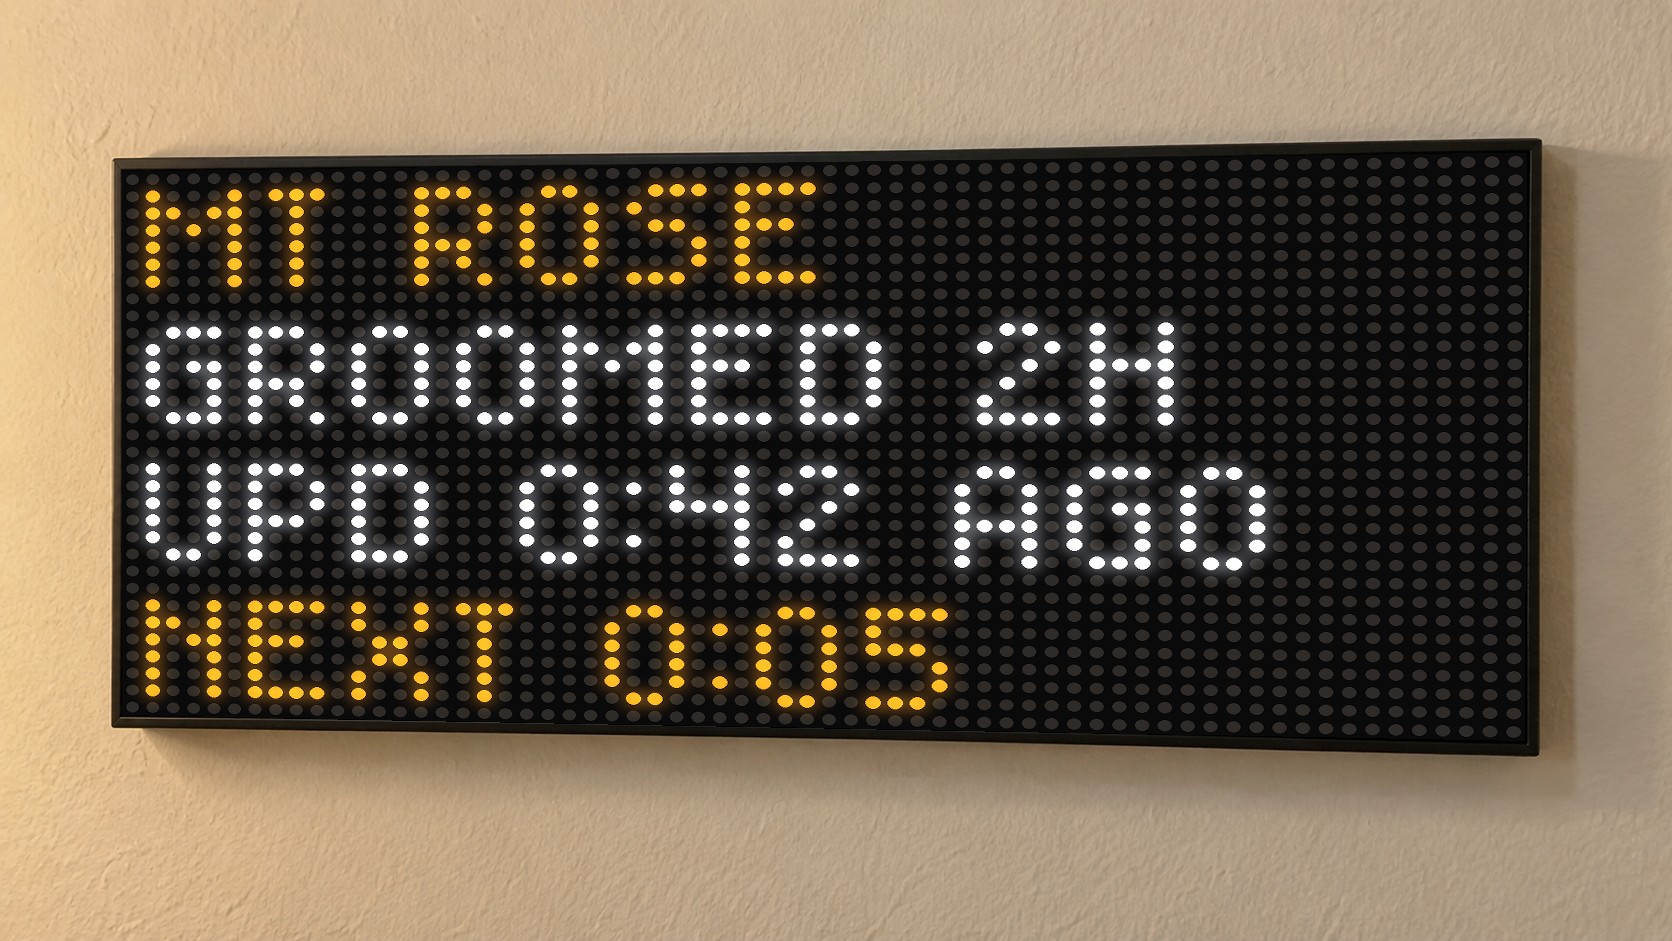
NO DATA: nothing fetched yet.BAD DATA: 3 failed reads in a row.STALE: the feed is over 10 minutes old, with the age shown on row 4.NO WIFI: the sign is offline.- Amber text: 1 or 2 failed reads, with the last good data still shown.
Close-ups
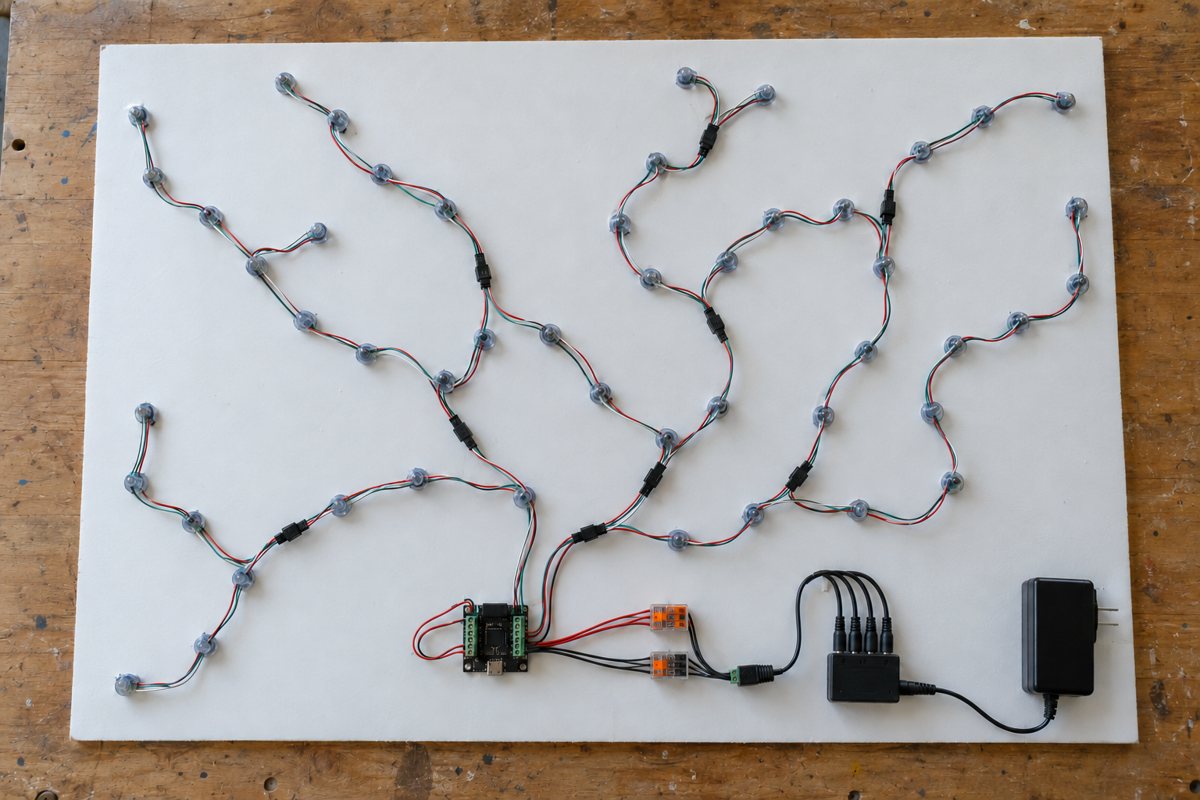
Parts
| Part | Qty | Unit | Line | Stock on 2026-10-13 |
|---|---|---|---|---|
| Sparkle Motion trail controller (6100) | 1 | $24.95 | $24.95 | Out of stock at Adafruit |
| WS2811 12 mm 5 V pixel string, 50 px, JST-SM | 4 | $12.98 | $51.92 | Various options in stock |
| 5 V 10 A supply, pixels (658) | 1 | $29.95 | $29.95 | In stock |
| 4-way 2.1 mm barrel splitter (1352) | 1 | $4.95 | $4.95 | In stock |
| WAGO 221-415 lever nuts, box of 25 (8 used) | 1 | $17.27 | $17.27 | Listed |
| 3-pin JST-SM cable set (1663) | 6 | $1.50 | $9.00 | Out of stock at Adafruit |
| Matrix Portal S3 sign controller (5778) | 1 | $19.95 | $19.95 | Out of stock at Adafruit |
| 64x32 RGB LED matrix, 4 mm pitch (2278) | 1 | $39.95 | $39.95 | In stock |
| 5 V 4 A supply, sign (1466) | 1 | $14.95 | $14.95 | In stock |
| DC jack to screw terminal adapter (368) | 2 | $2.00 | $4.00 | In stock |
| 18x24 in white foam board, 3/16 in | 1 | Local shop | Local shop | n/a |
| 18x24 in map print | 1 | Local shop | Local shop | n/a |
| Priced items | $216.89 | Before tax and shipping |
You also need
- Two USB-C data cables
- 22 AWG hookup wire
- Wire stripper
- 12 mm punch or drill bit
- Small flat screwdriver
- Multimeter
- Adhesive picture-hanging strips
Build steps
-
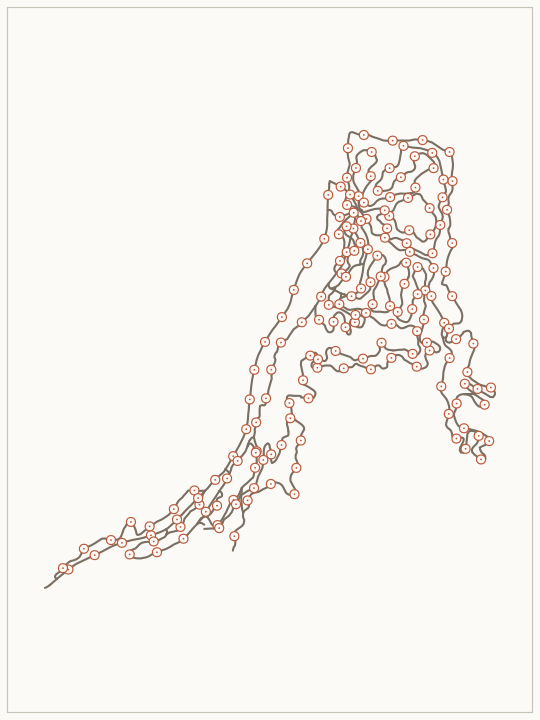
Print the map with hole marks
Print the trail map at 18x24 in with a hole mark every 1 in along each trail, then mount it on the 3/16 in white foam board.
Number the marks in the order each pixel string will run. That order becomes the trail to pixel map in the controller config.
-
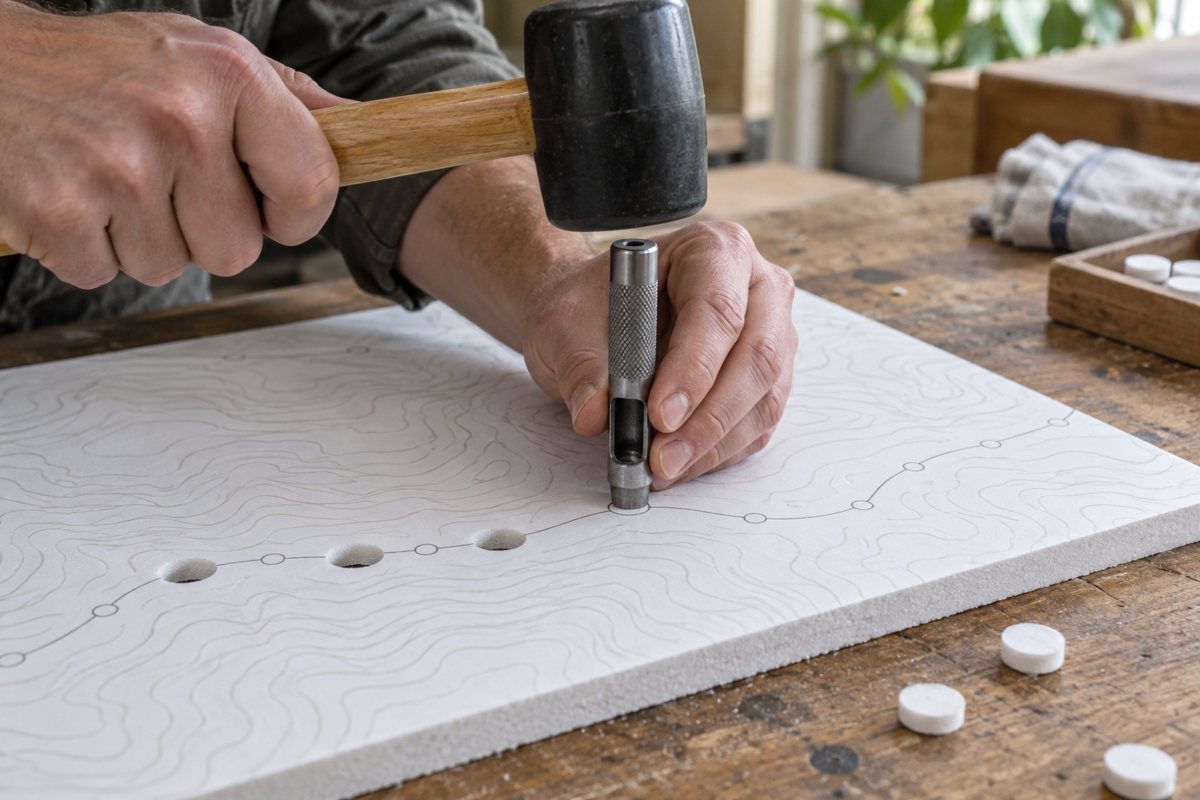
Punch the holes
Punch each mark with a 12 mm round punch, face up, over a scrap board.
-
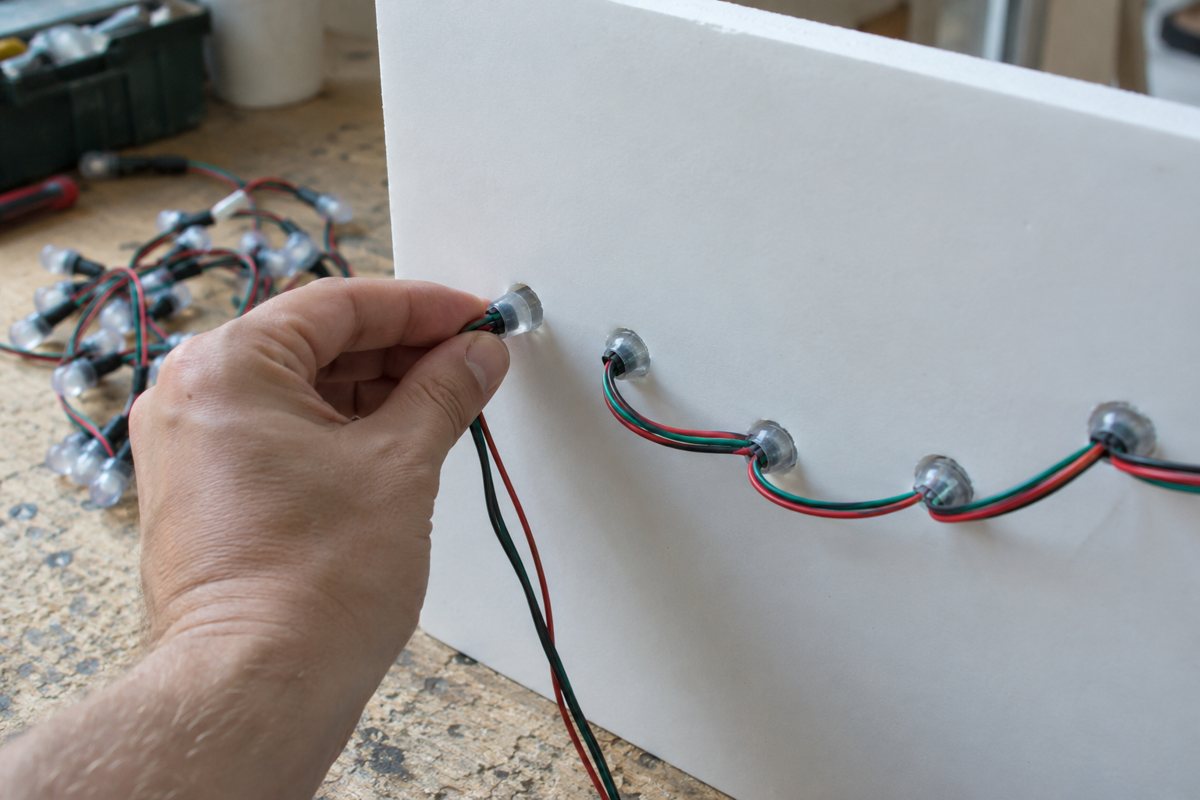
Push in the pixels in order
Work from the back. Start string 1 at mark 1 and follow the numbers. Four strings of 50 give 200 pixels; the map uses 196, so the last 4 on string 4 stay unused.
-
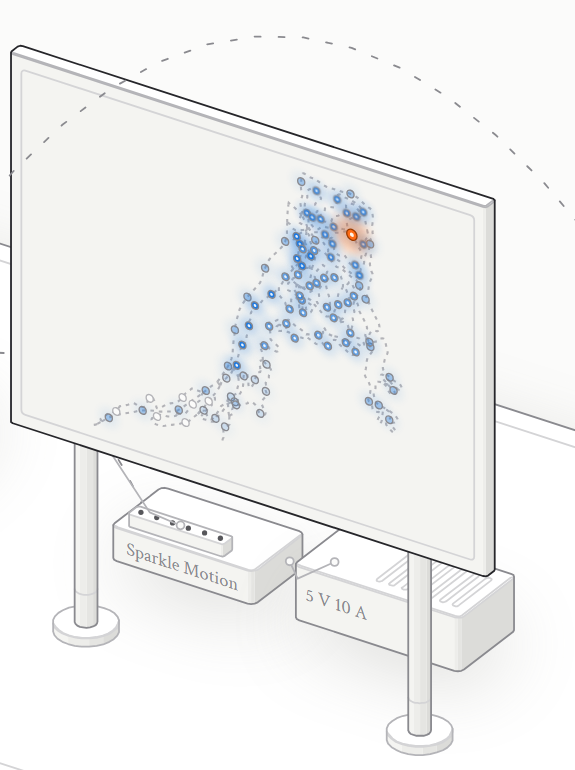
Wire the trail lights
- Put a JST-SM pigtail (cable set 1663) at the start of strings 1 and 3. Strings 2 and 4 start at junction pigtails B and D. Junction pigtails A and B sit between strings 1 and 2, and C and D between strings 3 and 4.
- 5 V 10 A supply into the 4-way barrel splitter.
- Splitter leg 1 into the Sparkle Motion barrel jack. The splitter feeds the Sparkle Motion and the pixel rails from one supply, so they share a common ground.
- Splitter leg 2 into DC adapter 1. Its + terminal feeds WAGO 1 (5 V) and its - terminal feeds WAGO 2 (GND).
- SIG1 (GPIO21) to the string 1 pigtail data wire. SIG2 (GPIO22) to the string 3 pigtail data wire.
- String 1 end plugs into junction pigtail A. Join the A and B data wires in WAGO 3. Junction pigtail B plugs into the string 2 start.
- String 3 end plugs into junction pigtail C. Join the C and D data wires in WAGO 4. Junction pigtail D plugs into the string 4 start.
- Put the 5 V and GND wires of the string 1 pigtail, junction pigtail B, the string 3 pigtail and junction pigtail D into WAGO 1 and WAGO 2.
- Cap the 5 V and GND wires on junction pigtails A and C, because the string end already carries power. Cap each with its own WAGO lever nut.
- WAGO 1 and WAGO 2 each hold five wires: one from the supply and one per string start. SIG1 feeds strings 1 and 2. SIG2 feeds strings 3 and 4.
- Wire the rails and pigtails with the supply unplugged and the strings disconnected.
- Set the meter to continuity. Touch one probe to WAGO #1 (5V) and one to WAGO #2 (GND). It must stay silent; a beep means a short.
- Plug in the supply with the strings still disconnected. Set the meter to DC volts. At each string's pigtail plug, red probe on the 5V pin and black on the GND pin should read about +5 V. A negative reading means that pigtail is reversed. Unplug and swap its wires at the WAGO nuts.
- Match each string's input plug to its spec sheet so 5V meets 5V and GND meets GND.
- Unplug the supply, connect the strings, then plug the supply back in.
The firmware caps brightness at 25%. Never run a full-white test at 100%, because 196 pixels would draw 11.76 A, more than the 10 A supply.
-
Wire the sign
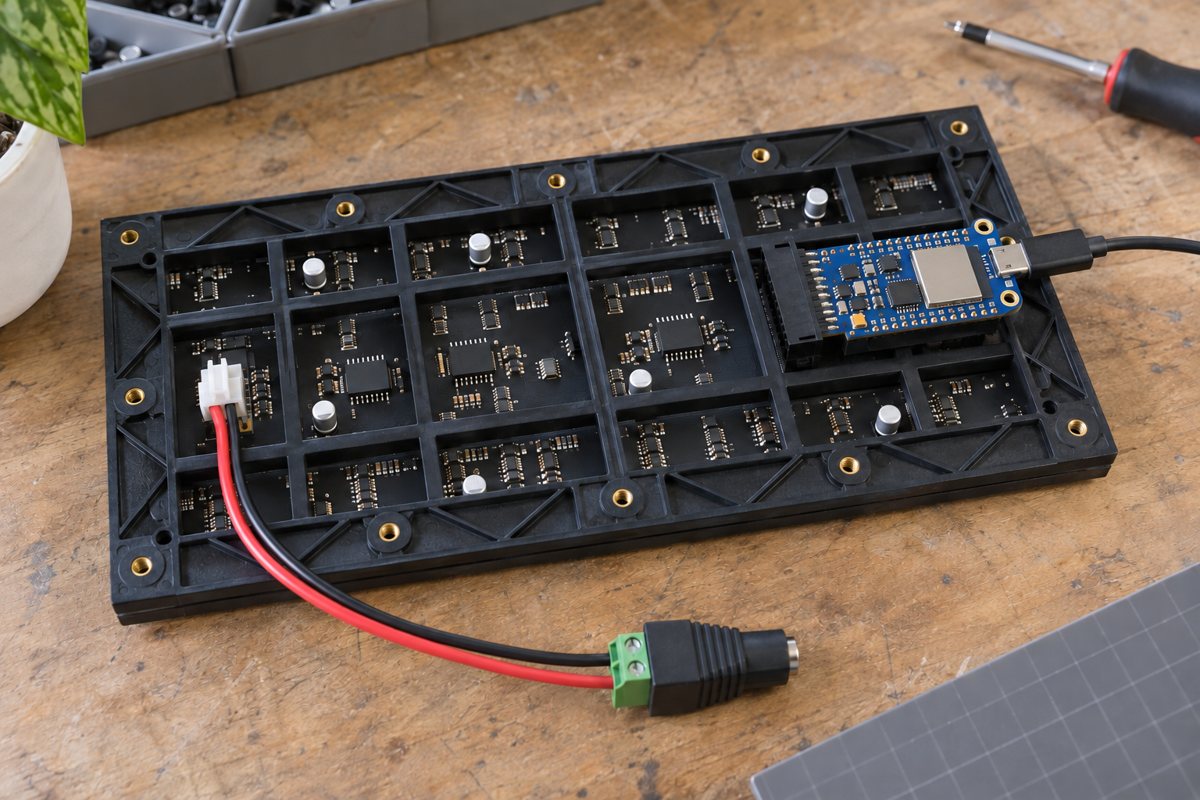
Plug the Matrix Portal S3 onto the panel's HUB75 header. Run the 5 V 4 A supply into DC adapter 2, then adapter 2's screw terminals to the Matrix Portal power terminals. Connect DC adapter #2's + terminal to the Matrix Portal's + power terminal and - to -.
-
Load the software
Plug each board into a computer by USB-C. Use the project's firmware files for both boards.
Sign (Matrix Portal S3).
- Install CircuitPython 9.2.x for the Matrix Portal S3: double-tap reset and drag the UF2 to the boot drive.
- Copy the
adafruit_requests,adafruit_connection_manager,adafruit_ntp,adafruit_display_textandadafruit_bitmap_fontlibraries intolib/, andtom-thumb.bdfintofonts/. - Copy
settings.toml.exampleto the drive assettings.tomland fill in Wi-Fi and your data URL. Copycode.pyandsignlogic.pyto the drive.
Trail controller (Sparkle Motion).
- Install PlatformIO.
- Copy
include/secrets.h.exampletoinclude/secrets.hand fill in Wi-Fi and your data URL. - Run
python tools/gen_pixelmap.py, thenpio run -e controller -t upload.
-
Test with demo mode
Demo mode is on when the device's data URL ends in
?demo=1. The sign showsDEMOon row 1. It replays a scripted grooming night. Each groomed trail lights in order and the groomer pixel runs ahead in orange.Brightness stays capped at 25%. The firmware holdsFastLED.setBrightness(64), about 2.95 A for 196 pixels. At full white the same pixels draw 11.76 A, above the 10 A supply, so every full-white test runs at the cap.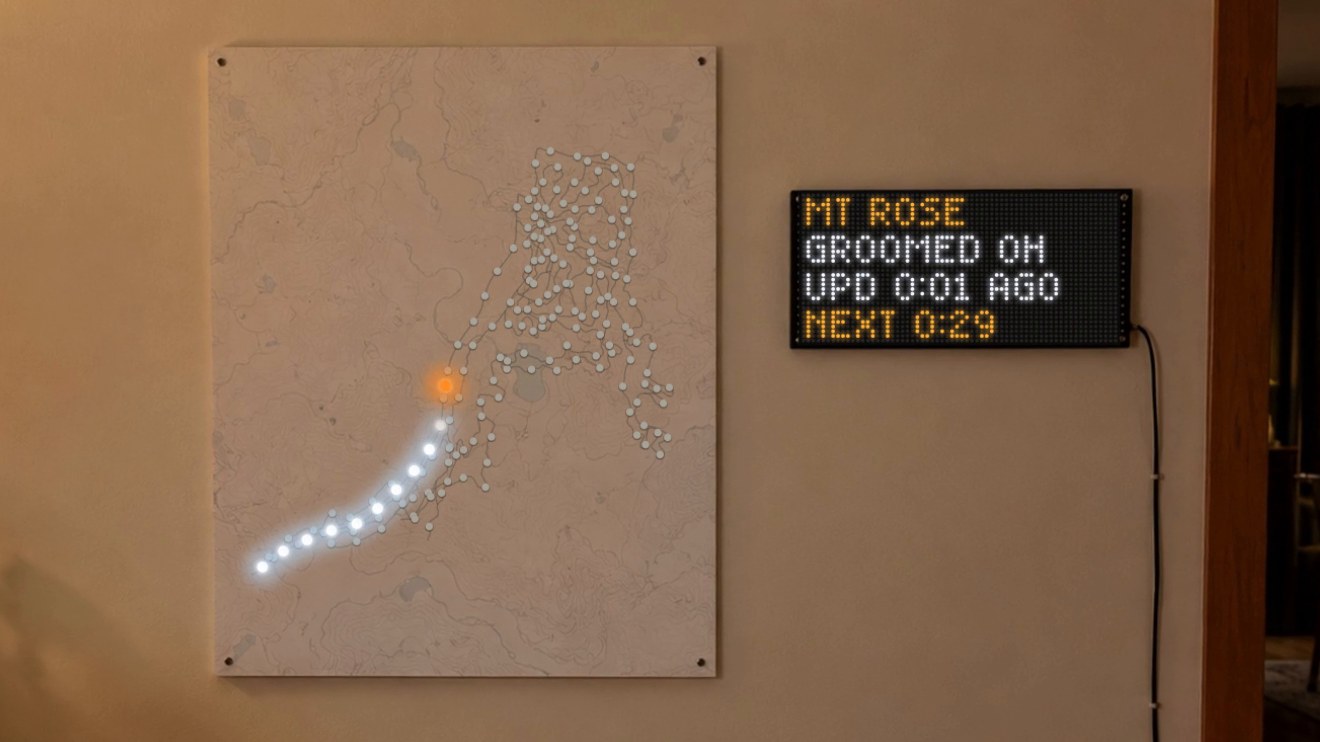
-
Hang it
Hang the board with adhesive picture-hanging strips, and the sign beside it at the same height.